Table of Contents

Play Video

SMART TRAFFIC LIGHT

A smart traffic light helps keep Us safe by controlling traffic, showing countdowns and ensuring everyone crosses the street safely and prevent from Accident.

Description:

The smart traffic light project developed by a student is designed to enhance road safety by providing clear indications to vehicles, helping prevent accidents. This project employs various signals—typically red, yellow, and green lights—to guide traffic flow effectively. 

The red light signals vehicles to stop completely. This phase allows pedestrians and other road users to safely cross intersections without the risk of oncoming traffic. It prevents accidents by ensuring vehicles do not enter the intersection when others have the right of way. 

The yellow light serves as a warning, indicating that the light will soon turn red. It advises drivers to slow down and prepare to stop. This transition phase helps in smoothly managing the flow of traffic between red and green lights, reducing the likelihood of abrupt stops or collisions. 

The green light allows vehicles to proceed safely through the intersection. It signals the right of way for vehicles while pedestrians and cyclists wait for the appropriate signal to cross. This phase ensures smooth movement of traffic and minimizes congestion by efficiently controlling when vehicles can move forward. 

Overall, the student’s smart traffic light project aims to create a safer environment on the road by providing clear, predictable signals to drivers and pedestrians. By adhering to these signals, drivers can better anticipate and respond to changes in traffic flow, reducing the risk of accidents and promoting safer commuting for everyone.

Components

  1. Arduino Uno X1
  2. Red, Green, and Yellow LEDs (1 Red, 1 Green, 1 Yellow )
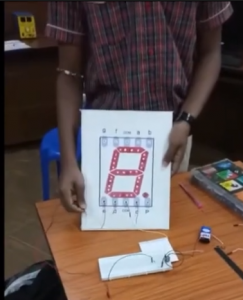
  3. Seven-segment display X1
  4. Resistors (220 ohm) X 4
  5. Breadboard X1
  6. Jumper Wires [Male to Male] X16

Pin Connections

  • Red LED: Pin 6
  • Yellow LED: Pin 9
  • Green LED: Pin 5
  • Seven-segment display: Pins 2, 3, 4, 7, 10, 11, 12, 8

Seven-Segment Display Segment Mapping

  • A: Pin 2
  • B: Pin 3
  • C: Pin 4
  • D: Pin 7
  • E: Pin 10
  • F: Pin 11
  • G: Pin 12
  • DP: Pin 8
// Pin definitions for LEDs
const int redLedPin = 6;
const int yellowLedPin = 9;
const int greenLedPin = 5;

// Pin definitions for seven-segment display
const int segmentPins[8] = {2, 3, 4, 7, 10, 11, 12, 8};

// Seven-segment display digit patterns (0-9)
const byte digitPatterns[10] = {
  0b00111111,  // 0
  0b00000110,  // 1
  0b01011011,  // 2
  0b01001111,  // 3
  0b01100110,  // 4
  0b01101101,  // 5
  0b01111101,  // 6
  0b00000111,  // 7
  0b01111111,  // 8
  0b01101111   // 9
};

// Timing for each light in seconds
const int redLightTime = 10;
const int yellowLightTime = 3;
const int greenLightTime = 10;

// Function prototypes
void displayDigit(int digit);
void updateTrafficLight(int red, int yellow, int green);
void countdown(int seconds, int light);

void setup() {
  // Initialize LED pins
  pinMode(redLedPin, OUTPUT);
  pinMode(yellowLedPin, OUTPUT);
  pinMode(greenLedPin, OUTPUT);

  // Initialize seven-segment display pins
  for (int i = 0; i < 8; i++) {
    pinMode(segmentPins[i], OUTPUT);
  }

  // Start with the red light
  updateTrafficLight(HIGH, LOW, LOW);
}

void loop() {
  // Red light
  countdown(redLightTime, redLedPin);

  // Green light
  countdown(greenLightTime, greenLedPin);

  // Yellow light
  countdown(yellowLightTime, yellowLedPin);
}

void displayDigit(int digit) {
  byte pattern = digitPatterns[digit];
  for (int i = 0; i < 8; i++) {
    digitalWrite(segmentPins[i], (pattern >> i) & 0x01);
  }
}

void updateTrafficLight(int red, int yellow, int green) {
  digitalWrite(redLedPin, red);
  digitalWrite(yellowLedPin, yellow);
  digitalWrite(greenLedPin, green);
}

void countdown(int seconds, int light) {
  for (int i = seconds; i >= 0; i--) {
    displayDigit(i);
    delay(1000);
  }
  digitalWrite(light, LOW);
}
Scroll to Top