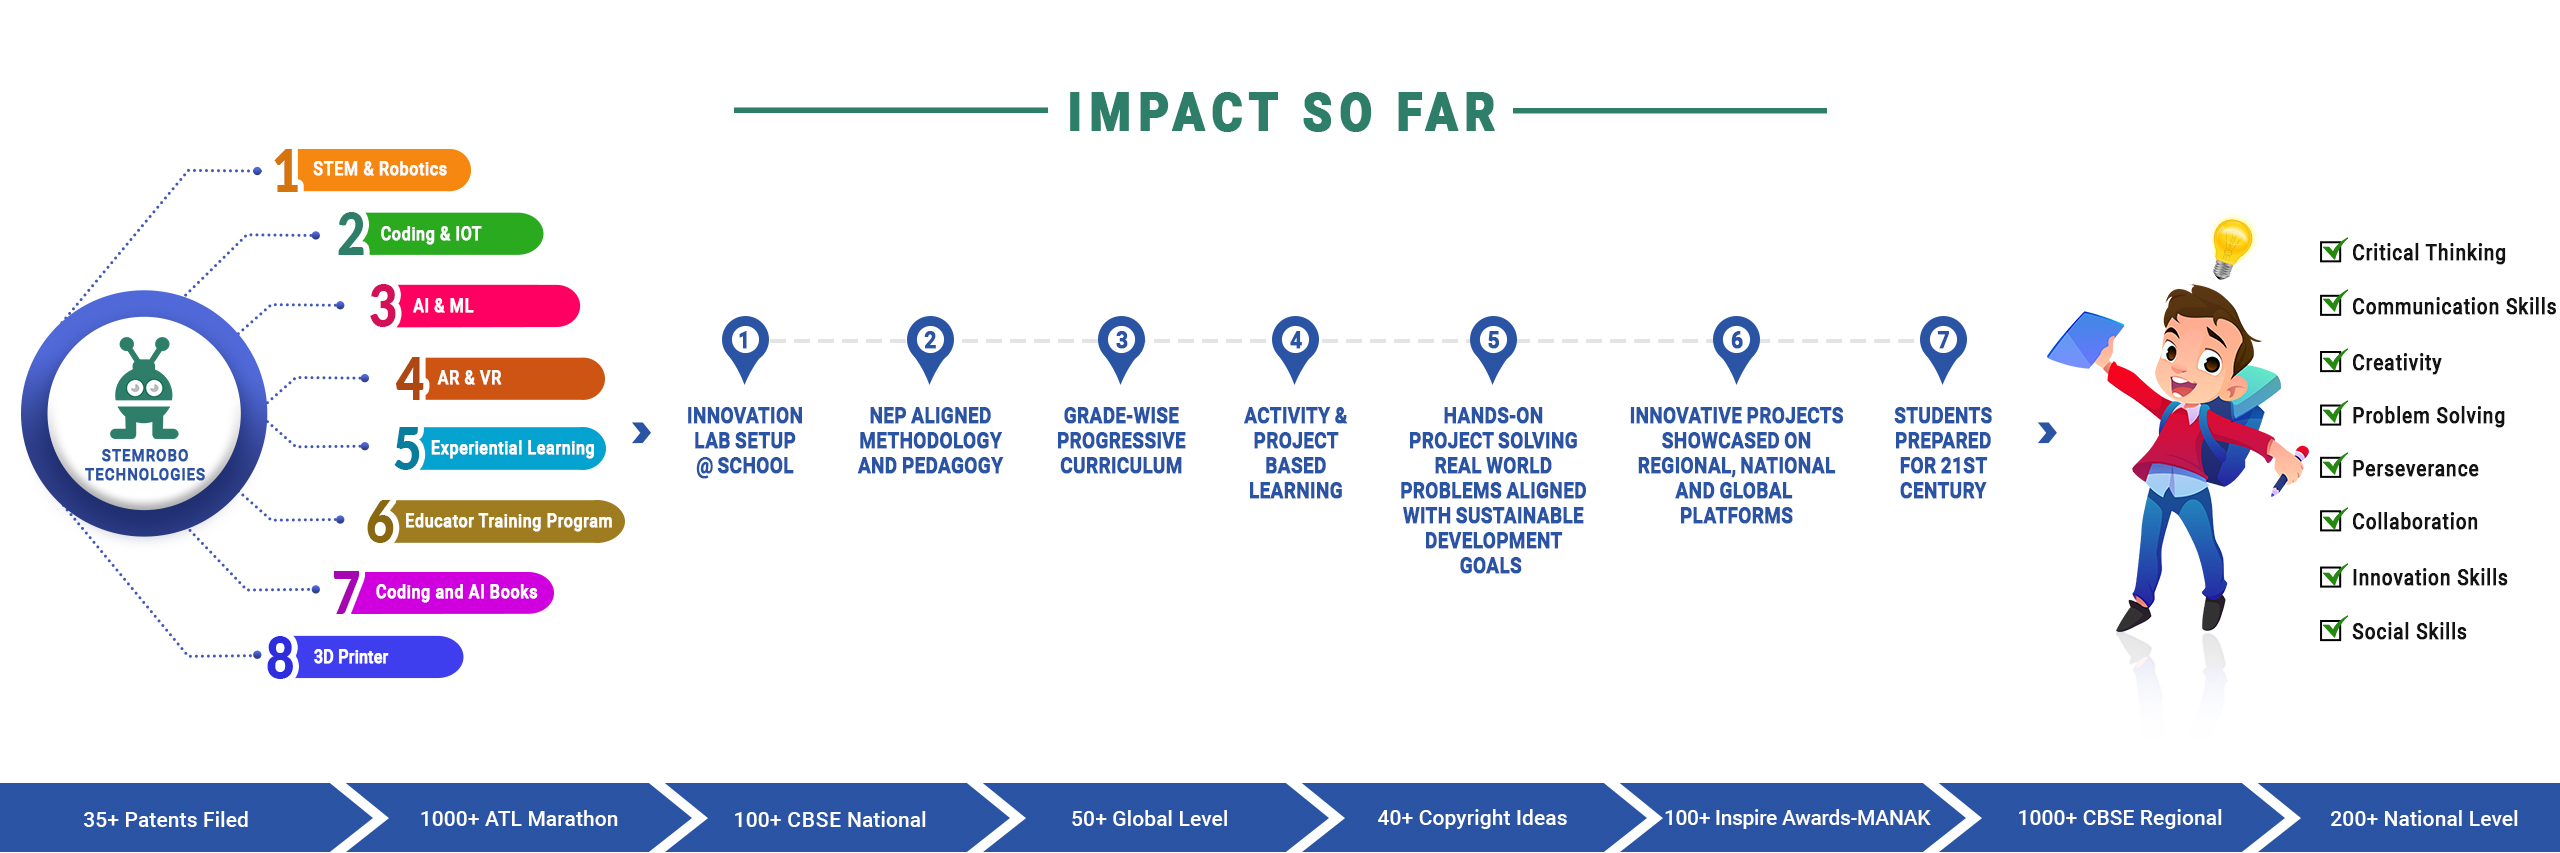
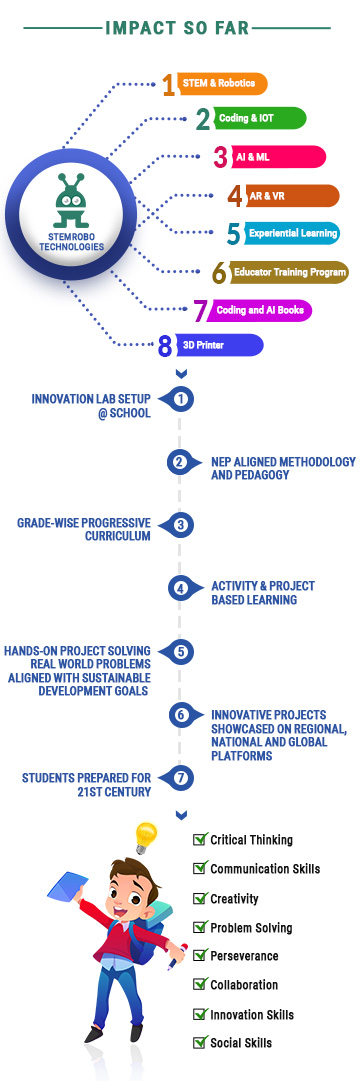
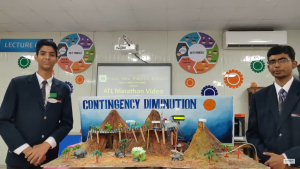
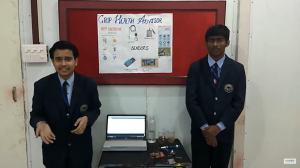
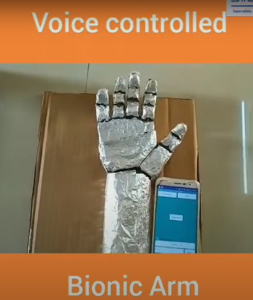
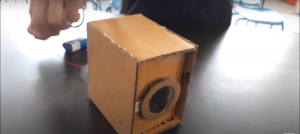
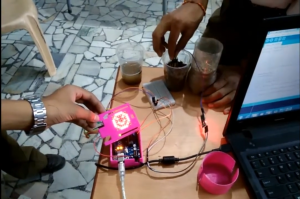
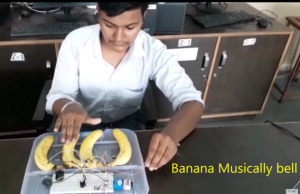
Table of Contents

Play Video

AUTOMATED FLOOR CLEANER

The floor cleaner is an automated robotic device designed to navigate and clean floors autonomously. It utilizes an ultrasonic sensor, a motor driver module (L298N), and a DC motor. The ultrasonic sensor is mounted on the robot to detect obstacles and ensure efficient navigation. The sensor sends out ultrasonic waves and measures the time it takes for the echo to return, calculating the distance to obstacles. The motor driver module controls the DC motor responsible for the movement of the cleaning brushes or wheels. The module receives signals from the Arduino, which processes data from the ultrasonic sensor. When the sensor detects an obstacle within a set distance, the Arduino signals the motor driver to stop or change direction, avoiding collisions. The DC motor powers the cleaner's brushes, effectively sweeping dirt and debris from the floor. Benefits: 1. Automated Cleaning: The robotic cleaner automates the cleaning process, reducing the need for manual labor and allowing users to focus on other tasks. 2. Efficient Navigation: The ultrasonic sensor ensures the cleaner navigates around obstacles efficiently, preventing collisions and ensuring thorough cleaning. 3. Cost-Effective: Utilizing readily available components like the ultrasonic sensor, motor driver, and DC motor makes the cleaner an affordable solution compared to commercial robotic vacuums. 4. Adaptability: The cleaner can be programmed to handle various floor types and cleaning patterns, making it versatile for different environments. 5. Environmental Impact: By maintaining clean floors, the robotic cleaner helps reduce the accumulation of dust and allergens, promoting a healthier living environment. This innovative floor cleaner is a practical, efficient, and cost-effective solution for maintaining clean and tidy floors in homes and offices.

The floor cleaner is an automated robotic device designed to navigate and clean floors autonomously. It utilizes an ultrasonic sensor, a motor driver module (L298N), and a DC motor. The ultrasonic sensor is mounted on the robot to detect obstacles and ensure efficient navigation. The sensor sends out ultrasonic waves and measures the time it takes for the echo to return, calculating the distance to obstacles.

The motor driver module controls the DC motor responsible for the movement of the cleaning brushes or wheels. The module receives signals from the Arduino, which processes data from the ultrasonic sensor. When the sensor detects an obstacle within a set distance, the Arduino signals the motor driver to stop or change direction, avoiding collisions. The DC motor powers the cleaner’s brushes, effectively sweeping dirt and debris from the floor.

Benefits:

  1. Automated Floor Cleaning: The robotic cleaner automates the cleaning process, reducing the need for manual labor and allowing users to focus on other tasks.
  2. Efficient Navigation: The ultrasonic sensor ensures the cleaner navigates around obstacles efficiently, preventing collisions and ensuring thorough cleaning.
  3. Cost-Effective: Utilizing readily available components like the ultrasonic sensor, motor driver, and DC motor makes the cleaner an affordable solution compared to commercial robotic vacuums.
  4. Adaptability: The cleaner can be programmed to handle various floor types and cleaning patterns, making it versatile for different environments.
  5. Environmental Impact: By maintaining clean floors, the robotic cleaner helps reduce the accumulation of dust and allergens, promoting a healthier living environment.

This innovative floor cleaner is a practical, efficient, and cost-effective solution for maintaining clean and tidy floors in homes and offices.

Components Needed:

  1. Arduino board (e.g., Arduino Uno)
  2. Ultrasonic sensor (HC-SR04)
  3. L298N motor driver module
  4. Two DC motors
  5. One 12v DC motor with metal gears
  6. Power supply and necessary cables [Male to Male X12, Male to Female 6]

Wiring:

  1. Ultrasonic Sensor (HC-SR04):
    • VCC to 5V
    • GND to GND
    • Echo to 8
    • Trig to 9
  2. L298N Motor Driver Module:
    • IN1 to 2
    • IN2 to 3
    • IN3 to 4
    • IN4 to 7
    • ENA to 5 (PWM)
    • ENB to 6 (PWM)
    • VCC to external power supply (+12V for motors)
    • GND to external power supply GND and Arduino GND
#define echoPin 8 // Echo Pin of Ultrasonic Sensor
#define trigPin 9 // Trig Pin of Ultrasonic Sensor
#define in1 2     // IN1 pin of L298N Motor Driver
#define in2 3     // IN2 pin of L298N Motor Driver
#define in3 4     // IN3 pin of L298N Motor Driver
#define in4 7     // IN4 pin of L298N Motor Driver
#define ena 5     // ENA pin of L298N Motor Driver (PWM)
#define enb 6     // ENB pin of L298N Motor Driver (PWM)

long duration;
int distance;

void setup() {
  Serial.begin(9600);
  
  // Set up Ultrasonic Sensor
  pinMode(trigPin, OUTPUT);
  pinMode(echoPin, INPUT);
  
  // Set up Motor Driver pins
  pinMode(in1, OUTPUT);
  pinMode(in2, OUTPUT);
  pinMode(in3, OUTPUT);
  pinMode(in4, OUTPUT);
  pinMode(ena, OUTPUT);
  pinMode(enb, OUTPUT);
  
  // Initial motor speed (0-255)
  analogWrite(ena, 200);
  analogWrite(enb, 200);
  
  // Start motors in forward direction
  forward();
}

void loop() {
  // Measure distance using Ultrasonic Sensor
  digitalWrite(trigPin, LOW);
  delayMicroseconds(2);
  digitalWrite(trigPin, HIGH);
  delayMicroseconds(10);
  digitalWrite(trigPin, LOW);
  
  duration = pulseIn(echoPin, HIGH);
  distance = duration * 0.034 / 2; // Convert to centimeters
  
  Serial.print("Distance: ");
  Serial.println(distance);
  
  if (distance < 20) { // If an obstacle is detected within 20 cm
    stop();
    delay(500);
    backward();
    delay(1000); // Move backward for 1 second
    stop();
    delay(500);
    left(); // Turn left to avoid obstacle
    delay(500);
    stop();
    delay(500);
    forward(); // Move forward again
  }
  
  delay(100);
}

void forward() {
  digitalWrite(in1, HIGH);
  digitalWrite(in2, LOW);
  digitalWrite(in3, HIGH);
  digitalWrite(in4, LOW);
}

void backward() {
  digitalWrite(in1, LOW);
  digitalWrite(in2, HIGH);
  digitalWrite(in3, LOW);
  digitalWrite(in4, HIGH);
}

void left() {
  digitalWrite(in1, LOW);
  digitalWrite(in2, HIGH);
  digitalWrite(in3, HIGH);
  digitalWrite(in4, LOW);
}

void right() {
  digitalWrite(in1, HIGH);
  digitalWrite(in2, LOW);
  digitalWrite(in3, LOW);
  digitalWrite(in4, HIGH);
}

void stop() {
  digitalWrite(in1, LOW);
  digitalWrite(in2, LOW);
  digitalWrite(in3, LOW);
  digitalWrite(in4, LOW);
}
Scroll to Top