In this project, you will build a four-wheel solar car using the following components: one Arduino Uno, one motor driver, one Bluetooth module, one solar panel, one capacitor, and four BO motors. This solar car is a fun and educational way to learn about electronics, programming, and renewable energy.
Components
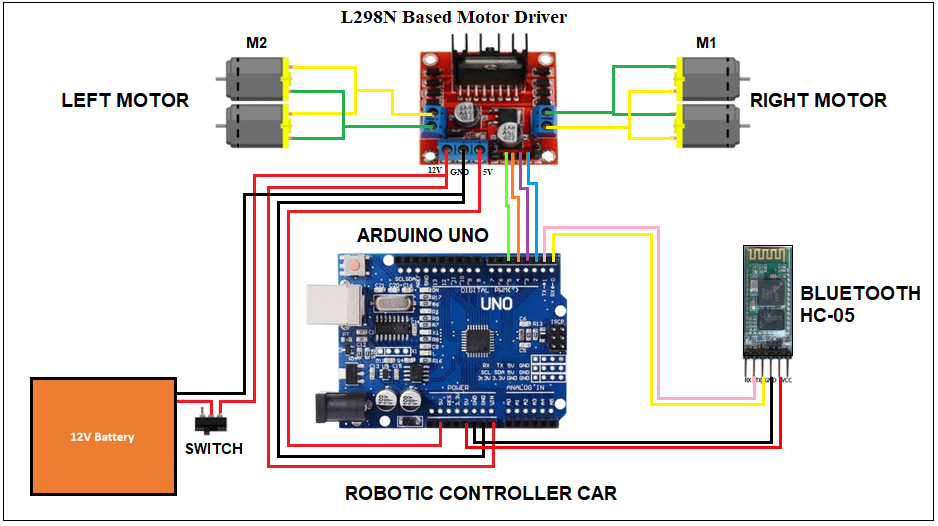
- Arduino Uno X1: This is the brain of your car. It will control all the other components.
- Motor Driver X1: This helps the Arduino control the four BO motors, making the wheels spin.
- Bluetooth Module X1: This allows you to control the car remotely using a smartphone or tablet.
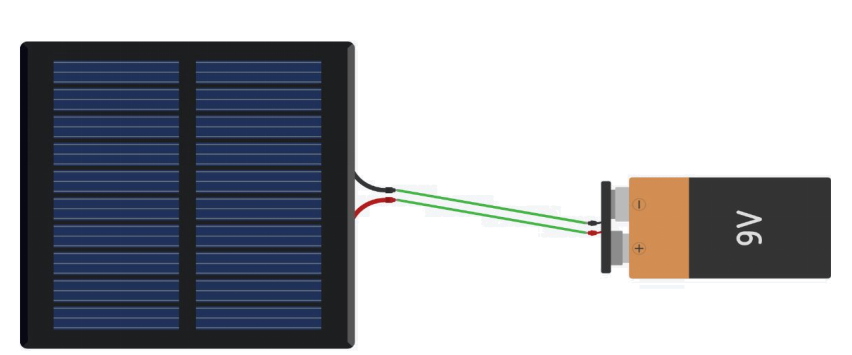
- Solar Panel X1: This captures sunlight and converts it into electricity to power the car.
- Capacitor X1: This stores extra energy from the solar panel to help power the car when there isn’t enough sunlight.
- BO Motors with Wheels X4: These are the small motors that will drive each of the car’s four wheels.
- Jumper Wires (male to male & male to female): We use jumper wire for connecting the components.
- Switch: This helps in turning ON and OFF the car.
- 12 V DC battery: This act as a power source.
Working process:
The solar panel collects sunlight it converts solar energy to electrical energy. This energy coming from solar pannel which powers the Arduino and the motors through the motor driver. The Bluetooth module allows to send commands to the Arduino from smartphone, telling the car when and where to move. The capacitor will help in storing extra energy and will provide it when needed.
Advantages::
- Eco-Friendly: Uses renewable solar energy, reducing the need for batteries or other power sources.
- Educational: Teaches basic electronics, programming, and renewable energy concepts.
- Remote Control: You can control the car using your smartphone, making it interactive and fun.
Disadvantages:
- Weather Dependent: The car relies on sunlight, so it may not work well on cloudy days or indoors without bright light.
- Power Limitations: Solar panels provide limited power, which might not be enough for fast or heavy-duty use.
- Complexity: Assembling and programming the car can be challenging for beginners without proper guidance.
By building this solar car, you will gain hands-on experience with renewable energy and electronics, creating a fun and educational project that you can show off to your friends and family.
Android App link requires to control the car:
Bluetooth Connection Process:
Step 1: Turn ON your mobile Bluetooth and search for HC-05.
Step 2: When HC-05 occurs, Click on it and enter 1234 as the pairing pin.
Step 3: Upon Successfully paired, Open the Android app.
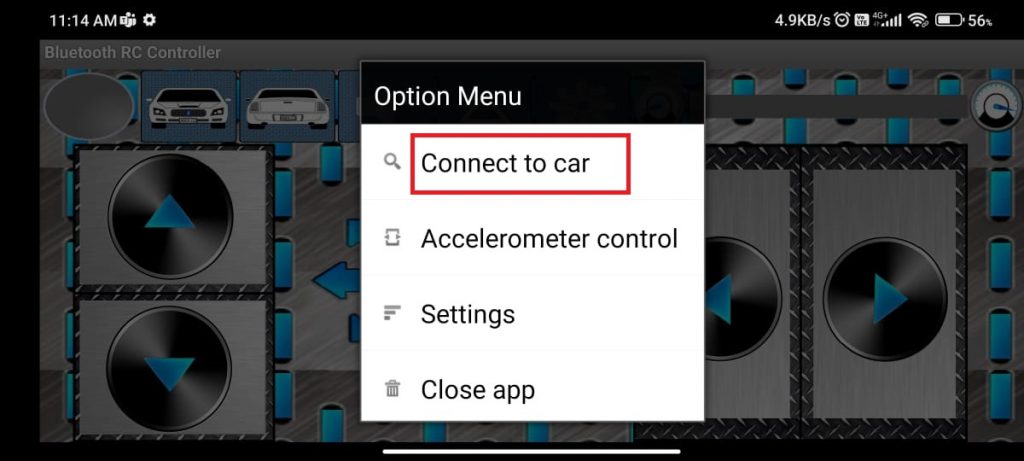
Step 4: Click on the setting button shown below.
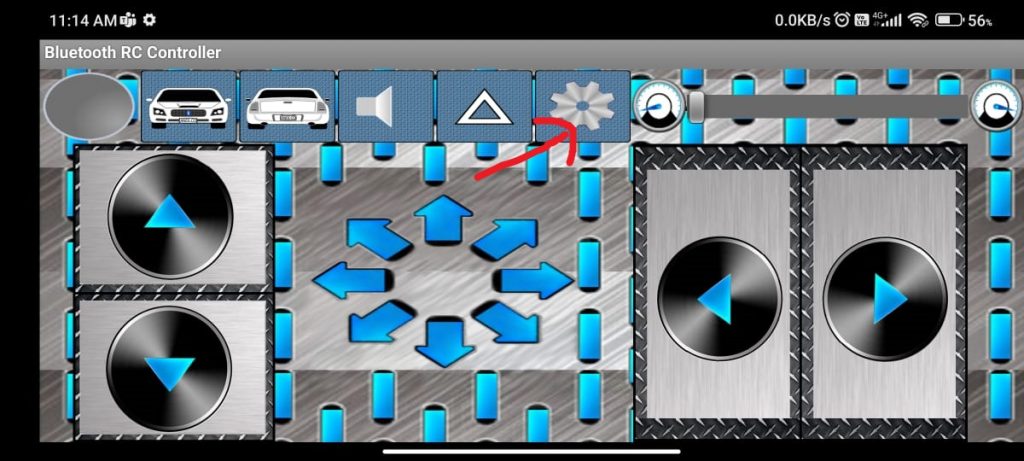
Step 5: Click on the “Connect to Car” option from the “Option Menu”.
Step 6: After that, Click on the “HC-05” option. The Green Color indicates that the robot is connected.
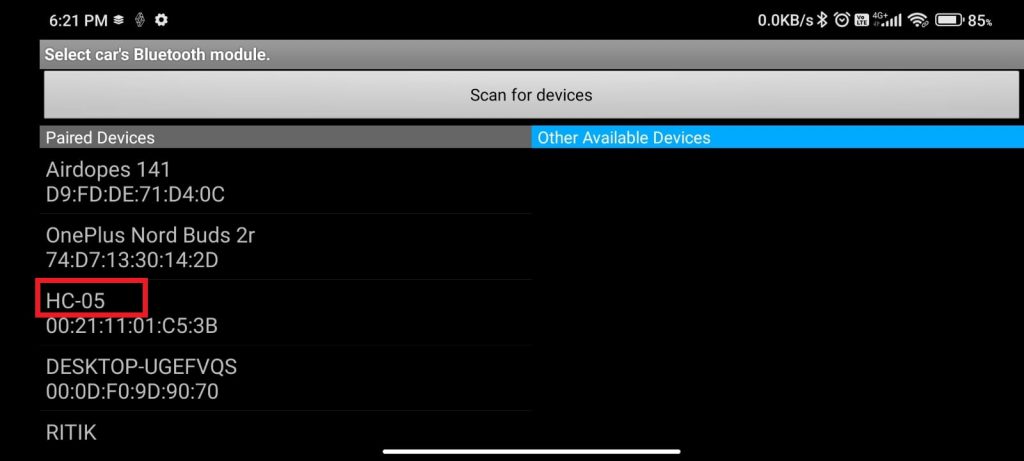
After completing the above steps, make sure the indicator on the Top-Left side turns Green. And, Start controlling.
#include <AFMotor.h>

// Motor shield library initialization
AF_DCMotor motor1(5);
AF_DCMotor motor2(4);
AF_DCMotor motor3(3);
AF_DCMotor motor4(2);

// Bluetooth module pins
char command;

void setup() {
  Serial.begin(9600);  // Initialize Bluetooth communication at 9600 baud
  motor1.setSpeed(255);  // Set initial motor speed (0-255)
  motor2.setSpeed(255);
  motor3.setSpeed(255);
  motor4.setSpeed(255);
}

void loop() {
  if (Serial.available() > 0) {
    command = Serial.read();
    controlCar(command);
  }
}

void controlCar(char command) {
  switch (command) {
    case 'F':  // Forward
      motor1.run(FORWARD);
      motor2.run(FORWARD);
      motor3.run(FORWARD);
      motor4.run(FORWARD);
      break;
    case 'B':  // Backward
      motor1.run(BACKWARD);
      motor2.run(BACKWARD);
      motor3.run(BACKWARD);
      motor4.run(BACKWARD);
      break;
    case 'L':  // Left
      motor1.run(BACKWARD);
      motor2.run(FORWARD);
      motor3.run(BACKWARD);
      motor4.run(FORWARD);
      break;
    case 'R':  // Right
      motor1.run(FORWARD);
      motor2.run(BACKWARD);
      motor3.run(FORWARD);
      motor4.run(BACKWARD);
      break;
    case 'S':  // Stop
      motor1.run(RELEASE);
      motor2.run(RELEASE);
      motor3.run(RELEASE);
      motor4.run(RELEASE);
      break;
    default:
      // Do nothing if an unknown command is received
      break;
  }
}