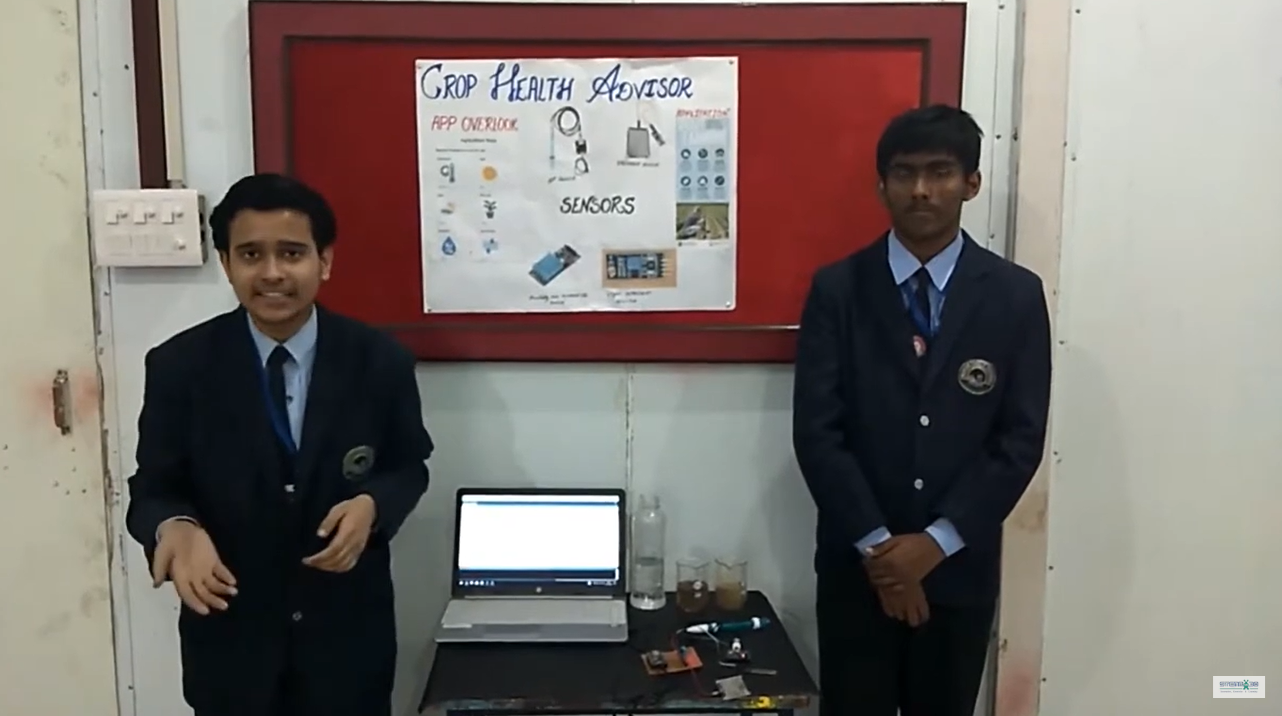
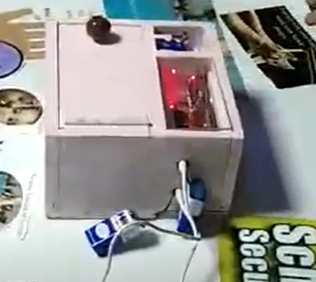
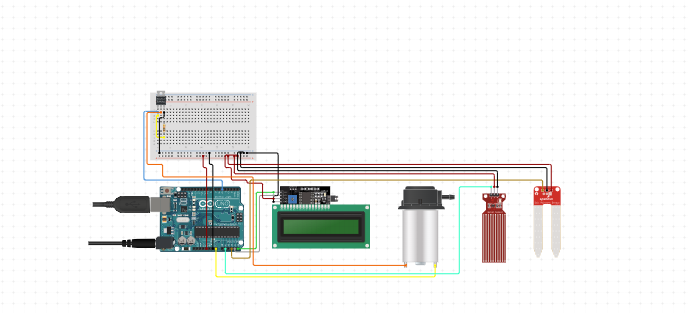
Agricultural Based Social Project utilizes an Arduino to automate water supply based on soil moisture levels, displaying data on an I2C LCD. Additionally, RFID technology verifies and distributes correct seed packets to farmers, promoting efficient farming and water management in rural areas. The system ensures precise irrigation and proper seed usage, enhancing agricultural productivity while conserving water resources effectively, Agricultural Based Social Project for school students.
Components Required
- Arduino Uno (or compatible microcontroller) – 1
- Water Level Sensor – 1
- Soil Moisture Sensor – 1
- RFID RC522 Module – 1
- I2C LCD Display (16×2) – 1
- Motor Pump – 1
- RFID Tags (for seed packets) -1
Connections
- Arduino Uno
- Power Supply: Connect the Arduino to a 5V power supply or USB.
- GND: Common ground connection for all components.
- Water Level Sensor
- VCC: Connect to the 5V pin on the Arduino.
- GND: Connect to the GND pin on the Arduino.
- Signal: Connect to analog pin A1 on the Arduino.
- Soil Moisture Sensor
- VCC: Connect to the 5V pin on the Arduino.
- GND: Connect to the GND pin on the Arduino.
- Signal: Connect to analog pin A3 on the Arduino.
- Motor Pump
- Positive Terminal: Connect to the 5 PIN of Arduino
- Negative Terminal: Connect to the GND of the power supply for the motor pump.
- I2C LCD Display
- VCC: Connect to the 5V pin on the Arduino.
- GND: Connect to the GND pin on the Arduino.
- SDA: Connect to the SDA pin on the Arduino (A4 on the Uno).
- SCL: Connect to the SCL pin on the Arduino (A5 on the Uno).
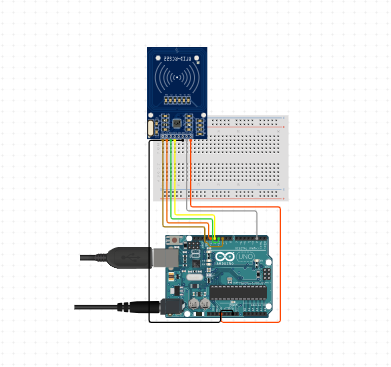
- RFID RC522 Module:
- SDA: Connect to digital pin 10 on Arduino Uno
- SCK: Connect to digital pin 13 on Arduino Uno
- MOSI: Connect to digital pin 11 on Arduino Uno
- MISO: Connect to digital pin 12 on Arduino Uno
- IRQ: Not connected
- GND: Connect to GND
- RST: Connect to digital pin 2 on Arduino Uno
- 3.3V: Connect to 3.3V (or 5V depending on module specifications
#include <Wire.h>
#include <LiquidCrystal_I2C.h>
#include <SPI.h>
#include <MFRC522.h>

#define SS_PIN 3   // Slave Select Pin for RFID module
#define RST_PIN 10   // Reset Pin for RFID module

MFRC522 mfrc522(SS_PIN, RST_PIN);  // Create instance of MFRC522

// Define pins for motor driver
const int motor1A = 11;  // Motor 1 control pin A
const int motor1B = 12;  // Motor 1 control pin B
const int motor2A = 8;  // Motor 2 control pin A
const int motor2B = 9;  // Motor 2 control pin B
// Define pins for IR sensors
const int leftIRSens = 4;   // Analog pin for left IR sensor
const int rightIRSens = 6;  // Analog pin for right IR sensor

// Define pins for buzzer and LED
const int buzzerPin = 2;
const int ledPin = 5;

// I2C LCD
LiquidCrystal_I2C lcd(0x27, 16, 2); // Address 0x27, 16 columns, 2 rows

void setup() {
  Serial.begin(9600);  // Initialize serial communication
  Wire.begin();        // Init I2C bus
  mfrc522.PCD_Init();  // Init RFID module
  lcd.init();          // Initialize the LCD
  lcd.backlight();     // Turn on the backlight

  // Set motor control pins as output
  pinMode(motor1A, OUTPUT);
  pinMode(motor1B, OUTPUT);
  pinMode(motor2A, OUTPUT);
  pinMode(motor2B, OUTPUT);

  // Set IR sensor pins as input
  pinMode(leftIRSens, INPUT);
  pinMode(rightIRSens, INPUT);

  // Set buzzer and LED pins as output
  pinMode(buzzerPin, OUTPUT);
  pinMode(ledPin, OUTPUT);

  // Stop motors initially
  stopMotors();
}

void loop() {
  // Scan for RFID cards
  if (mfrc522.PICC_IsNewCardPresent() && mfrc522.PICC_ReadCardSerial()) {
    // Card detected, activate buzzer and LED
    digitalWrite(buzzerPin, HIGH);
    digitalWrite(ledPin, HIGH);
    lcd.clear();
    lcd.setCursor(0, 0);
    lcd.print("DUMP YOUR");
    lcd.setCursor(0, 1);
    lcd.print("GARBAGE");
    delay(1000);  // Keep buzzer and LED on for 1 second
    digitalWrite(buzzerPin, LOW);
    digitalWrite(ledPin, LOW);

    // Move forward to collect garbage
    moveForward();
    delay(3000);  // Adjust as needed for robot movement time

    // Check IR sensors for obstacles
    if (analogRead(leftIRSens) > 500 || analogRead(rightIRSens) > 500) {
      // Obstacle detected, stop and turn
      stopMotors();
      delay(1000);
      if (analogRead(leftIRSens) > analogRead(rightIRSens)) {
        turnLeft();
      } else {
        turnRight();
      }
      delay(1000);
    } else {
      // No obstacle, continue moving forward
      moveForward();
    }
  } else {
    // No card detected, stop motors
    stopMotors();
    lcd.clear(); // Clear LCD display
  }

  delay(100);  // Adjust delay for loop stability
}

// Function to move robot forward
void moveForward() {
  digitalWrite(motor1A, HIGH);
  digitalWrite(motor1B, LOW);
  digitalWrite(motor2A, HIGH);
  digitalWrite(motor2B, LOW);
}

// Function to turn robot right
void turnRight() {
  digitalWrite(motor1A, HIGH);
  digitalWrite(motor1B, LOW);
  digitalWrite(motor2A, LOW);
  digitalWrite(motor2B, HIGH);
}

// Function to turn robot left
void turnLeft() {
  digitalWrite(motor1A, LOW);
  digitalWrite(motor1B, HIGH);
  digitalWrite(motor2A, HIGH);
  digitalWrite(motor2B, LOW);
}

// Function to stop robot
void stopMotors() {
  digitalWrite(motor1A, LOW);
  digitalWrite(motor1B, LOW);
  digitalWrite(motor2A, LOW);
  digitalWrite(motor2B, LOW);
}