This project explores a fundamental circuit that brings an LED to life using a breadboard, LED, push button, and a 9V battery – a perfect starting point for anyone curious about electronics!
Components Required:
- Breadboard: A reusable platform for prototyping electronic circuits. It provides rows of connected holes for easy component insertion and wire connections.
- LED (Light-Emitting Diode): The tiny light source that will illuminate when current flows through it in the right direction. Choose an LED color of your preference (red, green, yellow, blue, etc.).
- Resistor: A small electronic component that limits the current flowing through the LED, protecting it from damage. The specific resistor value depends on the LED’s voltage requirements and the 9V battery source. (We’ll discuss how to choose the right resistor value later)
- Push Button (or Tactile Switch): A button you press to complete the circuit and turn on the LED. There are different styles (push-to-make or momentary, push-to-break or latching), but a simple push-to-make button works well for this project.
- Jumper Wires (Male to Male x 3): Thin insulated wires that allow you to connect components on the breadboard. They come in various colors for better organization.
- 9V Battery: Provides the power source for your circuit.
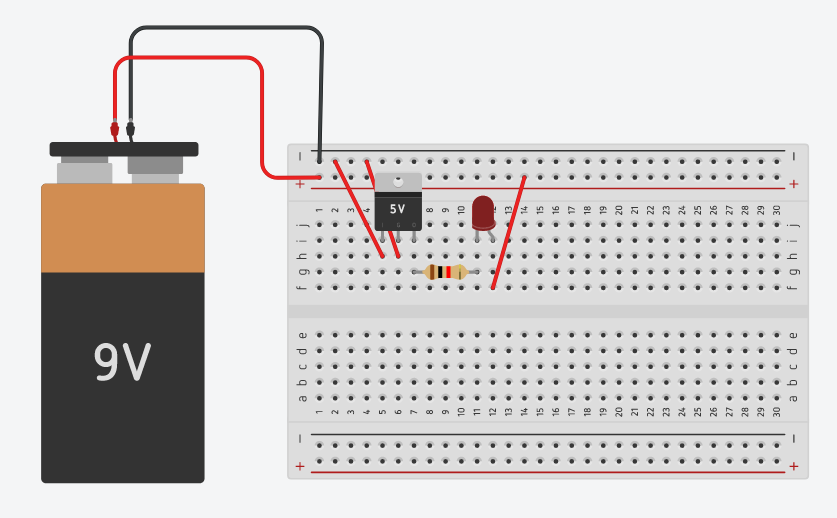
The circuit diagram is given below: