This project makes the car autonomous using sensor technologies to make it capable of precise navigation and interaction with its environment. The car combines the concept of line following, color recognition and obstacle avoidance mechanisms to navigate effectively.
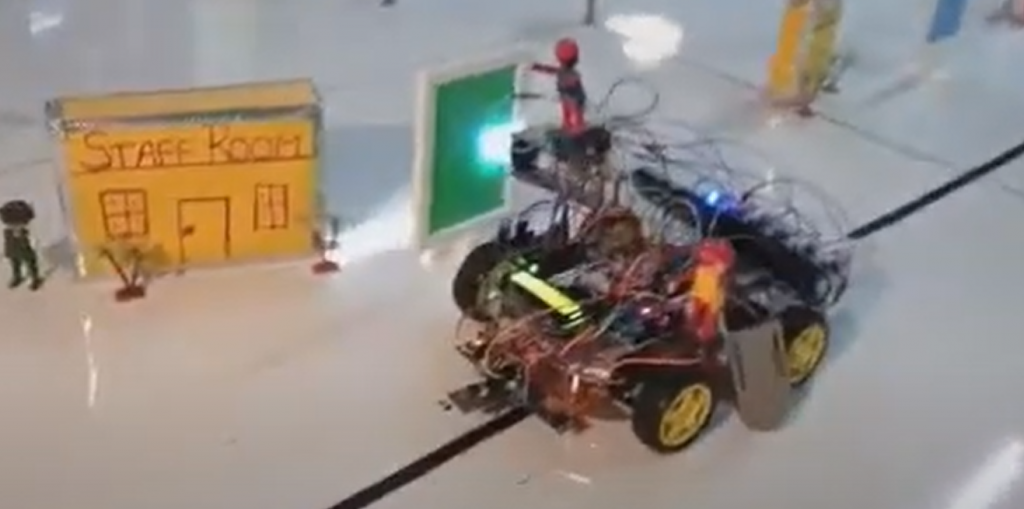
Arduino Uno is the brain of the project which interprets instructions from passengers who set the destinations by using the button. Once the destination is set, the vehicle initiates movement only when at least one location is designated, ensuring purposeful travel. Using the IR sensor, car follows the line and also alert the passenger if any obstacle is detected by activating the buzzer.

Upon reaching each specified destination recognized by unique color codes, the vehicle halts, and a servo motor rotates to signal completion. the “Auto car” not only exemplifies modern automation in transportation but also demonstrates the practical application of sensor fusion and autonomous control in enhancing everyday campus mobility solutions.
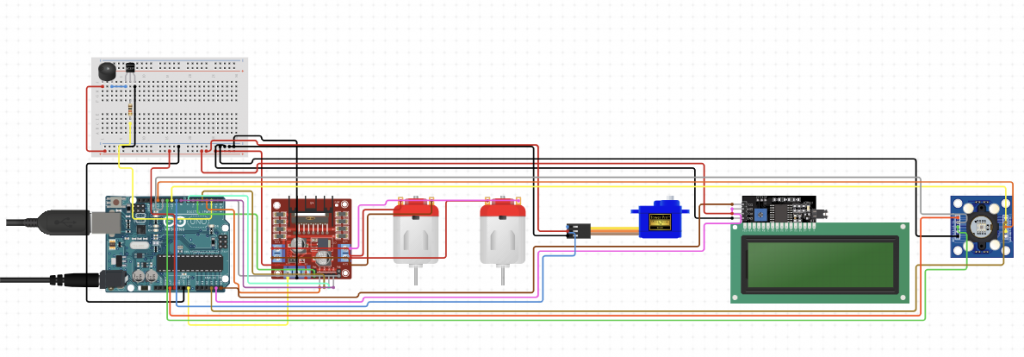
The circuit diagram and code is given below. Change your code according to your circuit connection.
#include <Wire.h>
#include <LiquidCrystal_I2C.h>
#include <Servo.h>

// LCD module initialization
LiquidCrystal_I2C lcd(0x27, 16, 2);  // Address 0x27, 16 columns, 2 rows

// Motor pins
const int leftMotorPin1 = 2;  // Example pin numbers, adjust as per your setup
const int leftMotorPin2 = 3;
const int rightMotorPin1 = 4;
const int rightMotorPin2 = 5;

// Color sensor pins
const int S0 = 6;
const int S1 = 7;
const int S2 = 8;
const int S3 = 9;
const int sensorOut = 10;

// IR sensor pins
const int irSensorLeft = A0;  // Example analog pin for left IR sensor
const int irSensorRight = A1; // Example analog pin for right IR sensor

// Button pins
const int button1Pin = 11;  // Example pin for button 1
const int button2Pin = 12;  // Example pin for button 2

// Servo motor for color sensor
Servo colorServo;

// Buzzer pin
const int buzzerPin = 13;  // Example pin for buzzer

// Variables
int destinationCount = 0;  // Number of destinations set by buttons
int currentDestination = 0;  // Index of current destination
bool moveAllowed = false;  // Flag to allow movement if at least one destination is set

void setup() {
  // Initialize LCD display
 lcd.begin();
  lcd.backlight();
  lcd.setCursor(0, 0);
  lcd.print("Welcome!");

  // Motor pins as outputs
  pinMode(leftMotorPin1, OUTPUT);
  pinMode(leftMotorPin2, OUTPUT);
  pinMode(rightMotorPin1, OUTPUT);
  pinMode(rightMotorPin2, OUTPUT);

  // Color sensor pins as outputs
  pinMode(S0, OUTPUT);
  pinMode(S1, OUTPUT);
  pinMode(S2, OUTPUT);
  pinMode(S3, OUTPUT);
  pinMode(sensorOut, INPUT);

  // Button pins as inputs with internal pull-up resistors
  pinMode(button1Pin, INPUT_PULLUP);
  pinMode(button2Pin, INPUT_PULLUP);

  // Attach servo for color sensor
  colorServo.attach(14);  // Example pin number for servo control

  // Initialize buzzer pin
  pinMode(buzzerPin, OUTPUT);

  // Initialize color sensor
  initializeColorSensor();
}

void loop() {
  // Read buttons and set destinations
  readButtons();

  // If no destination is set or no movement allowed, stop the car
  if (destinationCount == 0 || !moveAllowed) {
    stopCar();
    return;
  }

  // Check for obstacles
  if (isObstacleDetected()) {
    stopCar();
    // Activate buzzer
    digitalWrite(buzzerPin, HIGH);
    delay(1000);  // Buzzer active for 1 second
    digitalWrite(buzzerPin, LOW);
    // Handle obstacle avoidance (e.g., turn away from obstacle)
    return;
  }

  // Move the car towards the current destination
  moveToDestination();

  // Check if the destination has been reached based on color sensor input
  if (isDestinationReached()) {
    // Stop the car at destination
    stopCar();

    // Rotate servo motor 90 degrees
    colorServo.write(90);

    // Optionally, wait for a delay at destination before moving to the next one
    delay(3000);  // Example: 3 seconds delay at destination

    // Move to the next destination
    currentDestination++;
    if (currentDestination >= destinationCount) {
      // Reset to the beginning if all destinations have been reached
      currentDestination = 0;
    }
  }
}

void initializeColorSensor() {
  // Initialize color sensor parameters (S0, S1 for scaling frequency)
  digitalWrite(S0,HIGH);
  digitalWrite(S1,HIGH);
  // Set up other sensor control pins
  pinMode(S2,OUTPUT);
  pinMode(S3,OUTPUT);
}

void readButtons() {
  // Example implementation for reading buttons
  // Modify according to your actual button functionality
  if (digitalRead(button1Pin) == LOW) {
    // Code to set destination 1
    destinationCount = 1;
    moveAllowed = true;
  } else if (digitalRead(button2Pin) == LOW) {
    // Code to set destination 2
    destinationCount = 1;
    moveAllowed = true;
  } else {
    // No buttons pressed, reset destinations
    destinationCount = 0;
    moveAllowed = false;
  }
}

void stopCar() {
  // Example implementation to stop the car
  digitalWrite(leftMotorPin1, LOW);
  digitalWrite(leftMotorPin2, LOW);
  digitalWrite(rightMotorPin1, LOW);
  digitalWrite(rightMotorPin2, LOW);
}

void moveToDestination() {
  // Example implementation to move the car towards the destination
  // Implement your line following or movement logic here
}

bool isObstacleDetected() {
  // Example implementation to detect obstacles using IR sensors
  int irLeftValue = analogRead(irSensorLeft);
  int irRightValue = analogRead(irSensorRight);

  // Example threshold, adjust according to your setup
  if (irLeftValue > 500 || irRightValue > 500) {
    return true;
  } else {
    return false;
  }
}

bool isDestinationReached() {
  // Example implementation to check if destination (color) is reached
  // Implement your color recognition logic here
  // Return true if destination color is detected by TCS3200 sensor
  return false;  // Replace with actual logic
}
Application:
Campus Navigation: The car can navigate autonomously across a campus, stopping at predefined locations identified by unique color codes. This capability is particularly useful for visitors or new students unfamiliar with the campus layout, providing a convenient way to reach specific buildings or landmarks without assistance.
Personalized Transportation: Passengers can customize their travel experience by setting destination points using buttons installed at the rear of the car. This feature caters to individual preferences and needs, offering a personalized and user-friendly mode of transportation.
Efficient Mobility Solutions: By integrating line following and color recognition technologies, the car optimizes travel routes and stops precisely at designated locations. This efficiency not only saves time but also enhances the overall reliability and convenience of transportation within a controlled environment like a campus.
Safety Enhancement: The inclusion of obstacle avoidance technology ensures that the car navigates safely, avoiding collisions with objects or pedestrians in its path. This safety feature is critical for maintaining a secure environment and preventing accidents during operation.
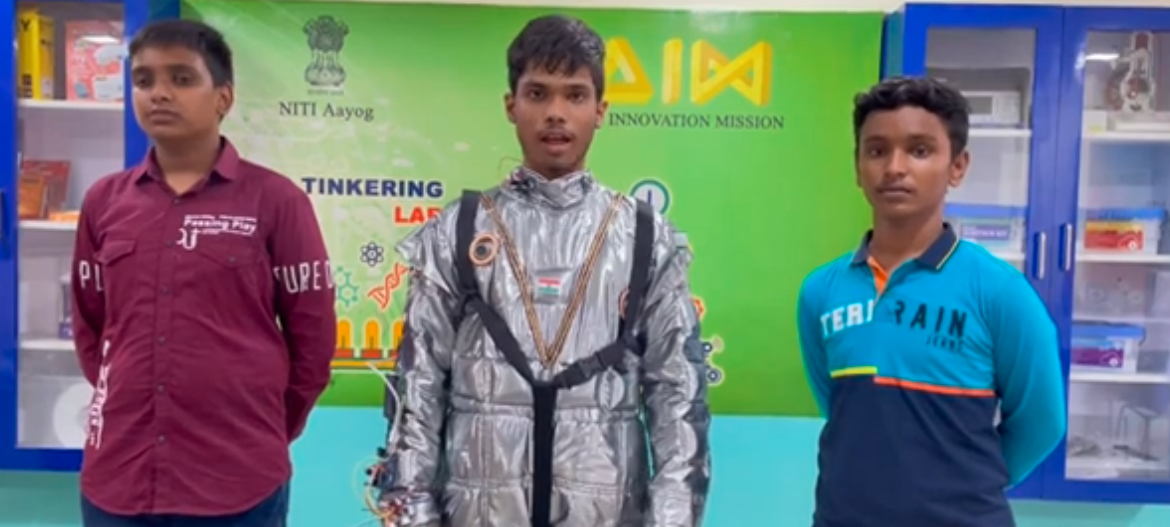
Education and Innovation: As a student-led project, the “Auto car” serves as an educational tool for learning about robotics, automation, sensor integration, and programming. It fosters creativity and hands-on experience in applying theoretical knowledge to real-world applications, preparing students for future careers in engineering, technology, and automation.