Here we build a project related to an underwater surveillance system that helps us keep an eye on what’s happening underwater. This system can find enemies or any other unauthorized activities and capture videos underwater, which is great for making sure no one is in a place they shouldn’t be, like a restricted area.
Purpose of the Project –
The main goal of this project is to detect any unauthorized activity in underwater areas, like finding enemies who shouldn’t be present there. It helps keep these areas safe by watching them all the time and letting us know if something unusual is happening.
Components List –
- Arduino Board X1: The main controller that manages the system.
- Sonar Sensor X1: Detects objects and measures distances underwater.
- Camera Module X1: Captures live video footage.
4. Jumper Wire(male to male & male to female): We use jumper wires for the connection of components.
Steps to Build the System –
- Set Up the Arduino: Connect the Arduino board to the sonar sensor and the camera module.
- Programming: Write simple code to make the Arduino work with the sonar sensor and camera. The code will tell the Arduino to alert us when the sonar detects something and to start recording video with the camera.
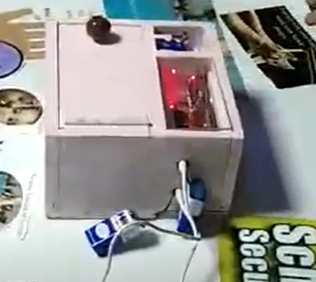
- Testing: Put everything in a waterproof box and test it in a small pool to make sure it works.
- Deployment: Once it’s working, put the system in the area you want to monitor.
With this project, we can explore underwater areas and keep them safe by watching for any unauthorized activities.

// Define pins for HC-SR04
const int trigPin = 9;
const int echoPin = 10;

// Variables for calculating distance
long duration;
int distance;

void setup() {
  // Initialize Serial Monitor
  Serial.begin(9600);

  // Set up pins for sonar sensor
  pinMode(trigPin, OUTPUT);
  pinMode(echoPin, INPUT);

  // Camera initialization code (depends on the specific camera and library used)
  // For OV7670, you may need additional setup code and libraries
}

void loop() {
  // Clear the trigPin
  digitalWrite(trigPin, LOW);
  delayMicroseconds(2);

  // Set the trigPin on HIGH state for 10 microseconds
  digitalWrite(trigPin, HIGH);
  delayMicroseconds(10);
  digitalWrite(trigPin, LOW);

  // Read the echoPin
  duration = pulseIn(echoPin, HIGH);

  // Calculate the distance
  distance = duration * 0.034 / 2;

  // Print the distance to the Serial Monitor
  Serial.print("Distance: ");
  Serial.print(distance);
  Serial.println(" cm");

  // Capture image or video from camera (simplified, actual implementation depends on the camera)
  // This is a placeholder for where camera code would go
  // Example: captureImage();

  delay(1000); // Wait for a second before the next loop
}

// Placeholder function for capturing image from camera
// Replace with actual camera library functions
void captureImage() {
  // Camera capture code goes here
  // Example: camera.capture();
}