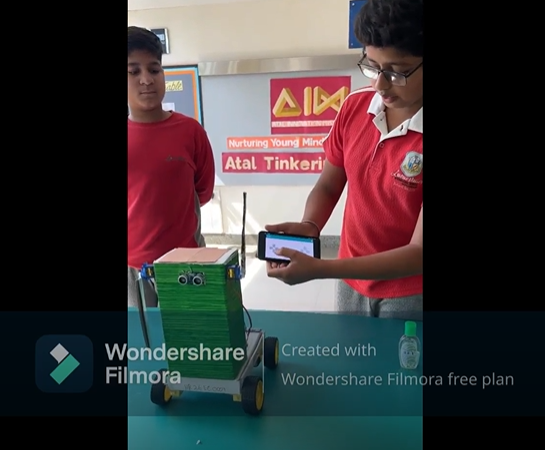
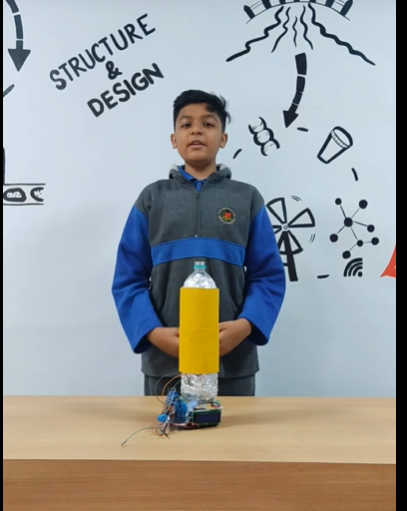
The Automatic Smart Dustbin not only promotes hygiene but also adds a touch of modern convenience to waste disposal. By seamlessly integrating advanced technologies like the ultrasonic sensor, servo motor, and Arduino Uno microcontroller, it ensures a hands-free operation that enhances cleanliness and reduces the need for physical contact, especially in high-traffic or sensitive environments. This innovative project underscores the potential of technology to transform everyday tasks, making them more efficient, sanitary, and user-friendly.The Automatic Smart Dustbin’s smart functionality extends beyond mere lid control. Its intelligent design can be further enhanced to include features such as waste level monitoring, automatic bag replacement systems, and even integration with smart home ecosystems for seamless waste management.
2. Components:
- Arduino Uno: The central microcontroller that processes inputs and controls the servo motor.
- Ultrasonic Sensor: Measures the distance to objects by emitting sound waves and receiving the echoes.
- Servo Motor: Opens and closes the dustbin lid.
- Dustbin: The container that will be modified to include the smart lid mechanism.
- Wiring and Power Supply: Connects all components and powers the system.
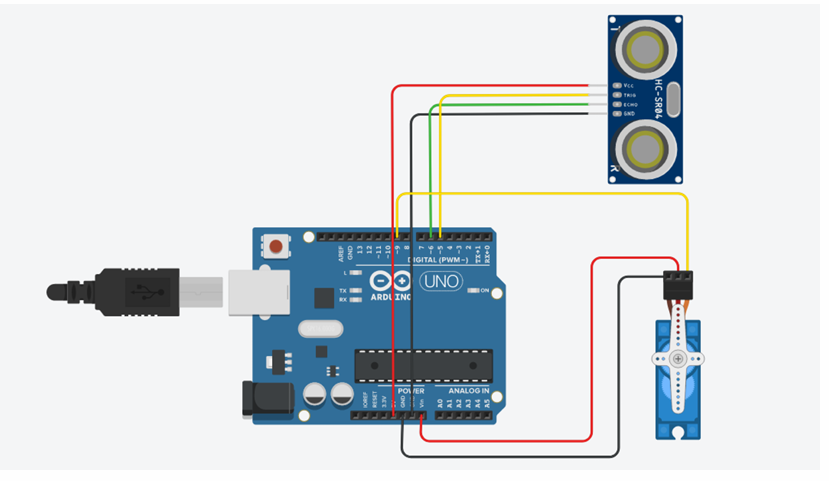
3. Setup/Circuit diagram:
- Ultrasonic Sensor: Connect the sensor’s VCC and GND to the Arduino’s 5V and GND. Connect the trig and echo pins to digital pins 5 and 6, respectively.
- Servo Motor: Connect the servo motor’s VCC and GND to the Arduino’s 5V and GND. Connect the signal pin to digital pin 7.
- Arduino Power Supply: Power the Arduino via a USB cable or battery pack.
4. Initialization:
- Arduino Code: Initialize serial communication for debugging.
- Pin Setup: Set up the ultrasonic sensor and servo motor pins as inputs or outputs as required.
5. Sensor Reading:
- Loop Function: Periodically read the distance from the ultrasonic sensor.
- Debugging: Print the distance value to the serial monitor for debugging purposes.
6. Decision Making:
- Distance-Based Actions:
- If the distance is less than 50 cm, the dustbin lid opens.
- If the distance is greater than 50 cm, the lid remains closed.
7. Servo Control:
- Movement Control:
- Open the lid by writing a position of 0 degrees to the servo.
- Close the lid by writing a position of 150 degrees to the servo.
- CODE
#include <Servo.h>   // Include the Servo library

Servo servo;         // Create a Servo object
int trigPin = 5;     // Define the trig pin
int echoPin = 6;     // Define the echo pin
int servoPin = 9;    // Define the new servo pin as pin 9
long duration, dist; // Variables for the duration of the echo and the distance measurement
long aver[3];        // Array for averaging distance measurements

void setup() {
    Serial.begin(9600); // Start serial communication at 9600 baud
    servo.attach(servoPin); // Attach the servo to the new pin 9
    pinMode(trigPin, OUTPUT); // Set the trig pin as an output
    pinMode(echoPin, INPUT);  // Set the echo pin as an input
    servo.write(0);    // Close the cap on power on
    delay(100);
    servo.detach();    // Detach the servo to save power
}

void measure() {
    digitalWrite(trigPin, LOW); // Ensure the trig pin is low
    delayMicroseconds(5);
    digitalWrite(trigPin, HIGH); // Send a 10us pulse to the trig pin
    delayMicroseconds(10);
    digitalWrite(trigPin, LOW);

    duration = pulseIn(echoPin, HIGH); // Read the echo pin, returns the sound wave travel time in microseconds
    dist = (duration / 2) / 29.1;      // Calculate the distance
}

void loop() {
    // Measure distance 3 times and average the result
    for (int i = 0; i < 3; i++) {
        measure();
        aver[i] = dist;
        delay(10); // Delay between measurements
    }

    dist = (aver[0] + aver[1] + aver[2]) / 3; // Calculate the average distance

    if (dist < 50) { // If the distance is less than 50 cm
        servo.attach(servoPin); // Attach the servo to pin 9
        delay(1);
        servo.write(0); // Open the lid
        delay(3000);    // Wait for 3 seconds
        servo.write(150); // Close the lid
        delay(1000);
        servo.detach(); // Detach the servo
    }

    Serial.print(dist); // Print the distance to the Serial Monitor
}
8. Testing and Calibration:
- Environment Testing: Test the dustbin in various environments to ensure it responds correctly to proximity.
- Sensor Calibration: Adjust the sensor range for optimal performance and reliability.

